Setting your availability
Your availability determines the slots offered to your clients on your booking page. It's the step to configure before activating your public page.
Understanding availability
The Availability tab brings together two complementary blocks:
- Public booking time slots — the hours, day by day, during which you accept appointments.
- Booking rules — the fine behavior of the public page (buffer between sessions, minimum notice before booking, maximum horizon).
Setting your time slots
- In Agenda, open the Availability tab.
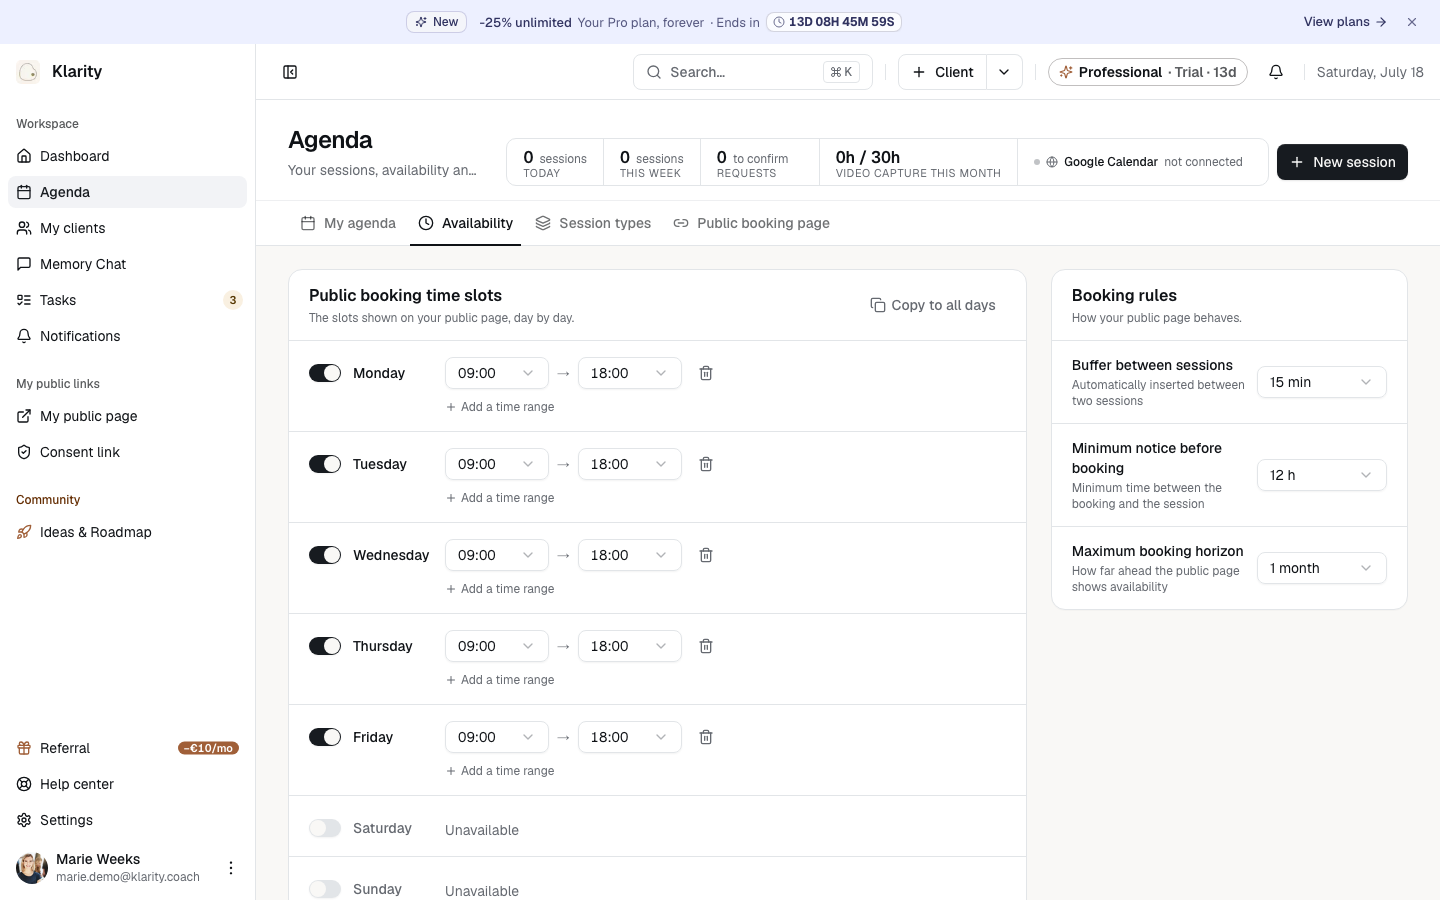
- For each day, turn the day on then click Add a time range and enter the start and end time. You can add several ranges per day (morning / afternoon); Remove deletes a range.
- To apply the same schedule everywhere, use Copy to all days: the ranges of the first configured day are copied across the whole week.
- Click Save. The Unsaved changes banner disappears and your free slots appear right away on your booking page.
Setting the booking rules
The Booking rules block refines what the client sees:
- Buffer between sessions — a buffer automatically inserted between two sessions.
- Minimum notice before booking — the minimum time required between the booking and the session (avoids last-minute bookings).
- Maximum booking horizon — how far ahead the public page shows availability (how far your clients can book).
Syncing your external calendars
At the very bottom of the Availability tab, the External calendar sync section helps you avoid double bookings by taking your other calendars into account.
- Google Calendar — two-way sync every 5 minutes: events from your Google calendar automatically block your public slots, and every session created in Klarity is added to your Google calendar. Click Connect Google Calendar to authorize access. This connection is also what enables automatic Google Meet link generation.
- Microsoft Outlook — coming soon: taking your Outlook calendar into account in your availability will arrive shortly.
Good to know
- Times are shown in your time zone (reminded below the agenda bar, e.g. "Paris time"). If your slots look off, check it in Settings › Profile and account › Localization.
- An already scheduled appointment or a blocked slot automatically hides the corresponding slot on the client side: no double booking possible.
Related articles
Updated on: 19/07/2026
Thank you!