Understanding the agenda
The agenda is the control center for all your appointments: your calendar, your availability, your session formats and your booking page. This article tours each tab so you can find your way around quickly.
Understanding the agenda
The Klarity agenda brings together in a single screen what used to be scattered across several tools: seeing your appointments, opening your slots for booking, defining your session formats and publishing your public link. Everything is organized into four tabs at the top of the page.
The four tabs
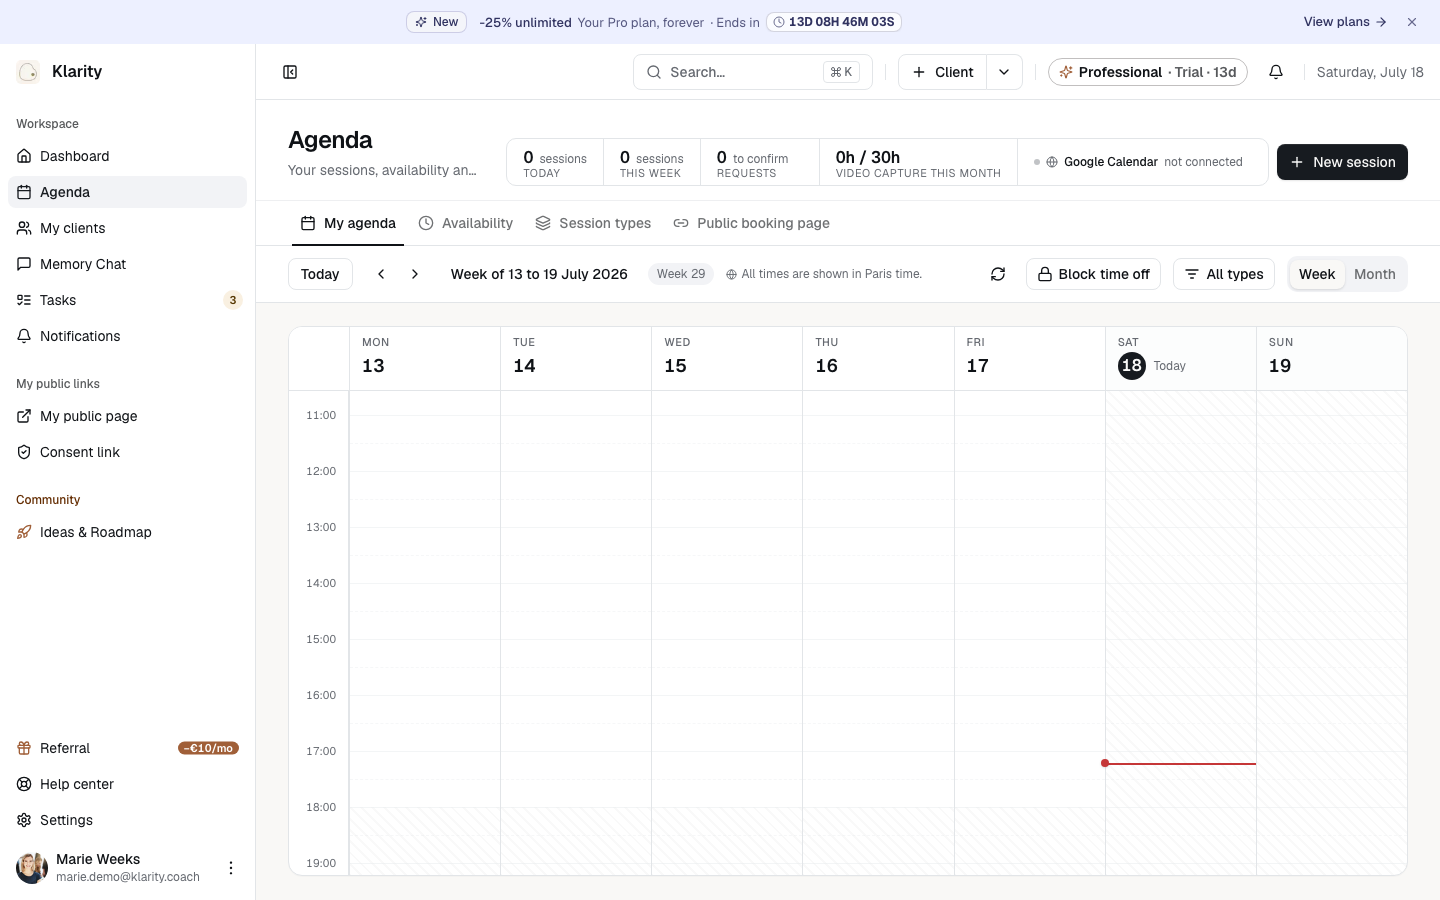
- My agenda — your calendar in Week or Month view. It shows scheduled appointments, blocked time and, if you've connected it, events from your Google Calendar. The top bar also shows indicators: Today, This week and Requests to confirm.
- Availability — the Public booking time slots, day by day, the Booking rules (buffer between sessions, minimum notice and maximum horizon) and the External calendar sync (Google Calendar connection). This is what decides the slots offered on your public page.
- Session types — your reusable formats (name, duration, price, mode and location, AI processing). Each type structures how an appointment is created and shapes your booking page.
- Public booking page — activation, custom URL, displayed identity, your Google showcase (a booking link to add to your listing) and a preview of the page your clients use to book.
The quick actions on the My agenda tab
- New session (top right) — schedule an appointment yourself, without waiting for a booking.
- Block time off (in the toolbar) — neutralize a time range to make it unavailable for booking.
- The filter by session type and the Refresh button round out the toolbar.
Setting up the calendar display
Two settings control how your agenda is displayed. Both live in Settings › Profile and account › Localization.
- Time zone — all agenda times (grid, sessions, blocked time) are shown in this time zone, stated in plain text below the top bar (e.g. "All times are shown in Paris time"). If your slots look off, this is the first setting to check.
- Start week on — choose Monday or Sunday: the Week view and the Month view then start on that day.
Related articles
Updated on: 19/07/2026
Thank you!